Not everyone is privileged enough to get their hands on a WPS-supported router. In that case, performing the Netgear extender seems quite difficult. But, you need not worry. WPS is not the only method that you can use to set up your WiFi range extender. If you don’t have access to a WPS-supported router, then you can make the extender up and running via the http://192.168.1.250 IP address. Discussed in this post are the guidelines that you need to follow to do a Netgear extender setup without WPS i.e. via the default IP address.
Steps to Do Netgear Extender Without WPS
-
Position Your Extender
The Netgear extender setup process without the use of a WPS button demands you to position your range extender properly. Therefore, once you’re done with the unboxing thing, consider placing your WiFi device at an appropriate location. The location of your extender is not supposed to be the one near:
-
Electronic gadgets: televisions, microwave ovens, refrigerators, treadmills, etc.
-
Bluetooth devices: keyboards, mouse, speakers, etc.
-
Reflexive surfaces: metals, glasses, lenses, mirrors, etc.
-
Water-carrying objects: geysers, aquariums, etc.
Once your extender is made to sit at a location free of the aforementioned things, you can proceed to power it up and follow the next step.
-
Connect Extender and Router
The next step demands you create a connection between the WiFi devices (extender and router). For this, you have two choices in hand: a wired source or a wireless one. It completely relies on you which option you pick. However, while connecting your devices, you need to take care of a few things:
-
Wired source: The cable roped in for coupling the Netgear range extender and the main router must be intact in all cases. Additionally, aim to maintain a finger-tight connection.
-
Wireless source: If a wireless connection is your thing, then you are supposed to make sure that your WiFi devices do not share a distance more than the pre-set value.
-
Open a Web Browser
To do Netgear extender setup without WPS, you need to get your hands on a web browser. It will help you access its default IP address and reach the extender’s dashboard. So, switch on your computer or laptop and load an internet browser thereafter. You have numerous options available for the web browser. But, the one you chose must fulfill the following conditions:
-
The web browser must not be out of date.
-
It should not be carrying a pent-up cache and cookies.
-
Access the Extender’s IP
The moment you feel that your web browser is ready to help you give a shot at the next step, consider making your way to the address field. Once you reach there, input the default IP address and press the Enter key. The IP address entrée should be done taking the following points into consideration:
-
No typing mistakes should be committed while entering the Netgear extender IP.
-
You must enter the IP address of your device into the address bar only. Not the search bar!
-
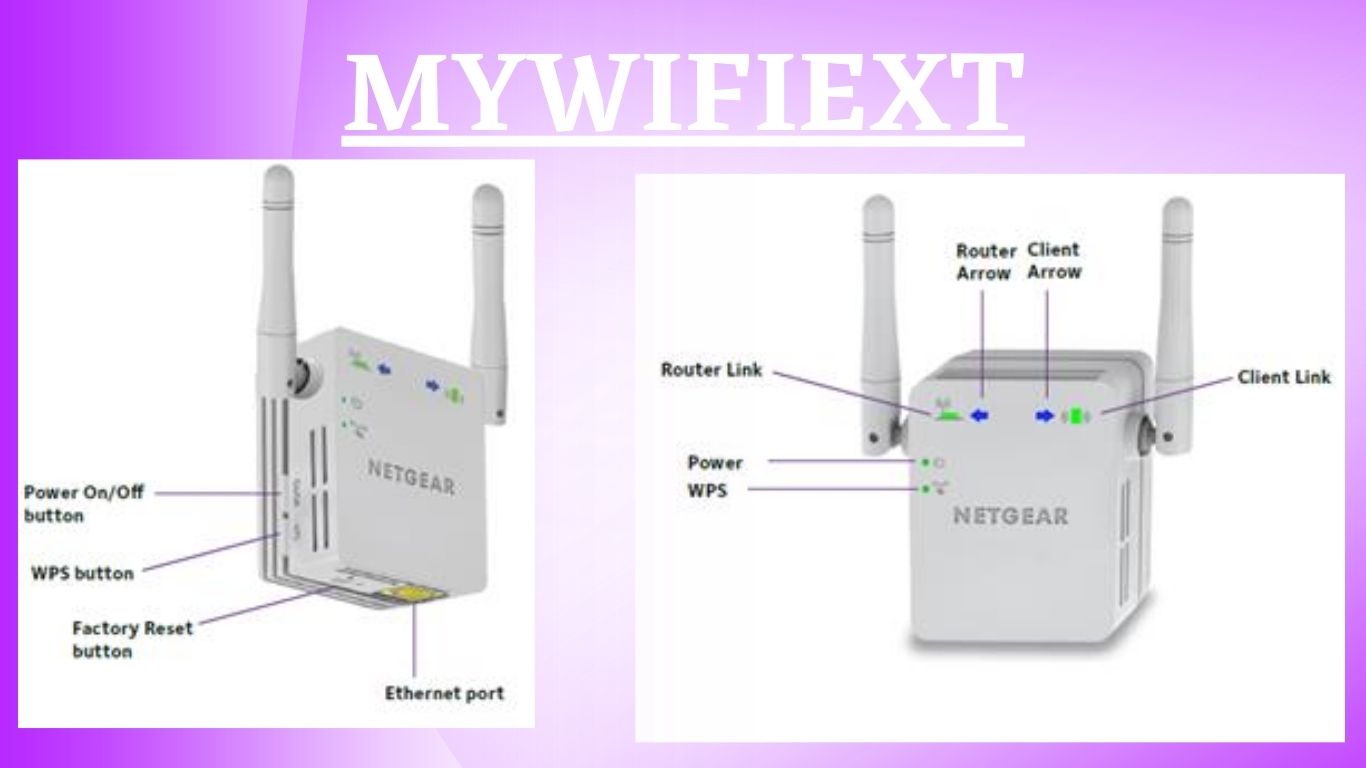
Enter Login Details
With the successful assessment of the IP address of your Netgear extender, you will find yourself on the login window. This window prompts you to input the default password and username of the WiFi device. Therefore,
-
Refer to the Netgear user manual to find out the default values of your extender’s codes.
-
Once found, enter the required details into the fields provided and hit the Log In button.
Note: The default login details of your extender must be entered carefully due to their case-sensitive nature. Additionally, ensure that you are entering these details into their provided spaces only.
-
Go Through On-screen Instructions
Right after you press the Log In button, you will be taken to the Netgear Genie setup dashboard. This is to inform you that this dashboard is also known as the range extender’s BASIC Home screen. Here, you will see a number of instructions. These instructions will be your further guiding light for the Netgear extender setup without WPS. Therefore, follow them one by one and see how your home network gets set up in front of your eyes.
The Concluding Thought
The extender setup procedure via its default IP address has been a boon for many users. After all, it lets them set up their extenders in the absence of a WPS-supported router. We’ve tried to put complete information regarding the Netgear WiFi extender setup without the WPS approach in this post. However, in case you get stuck amidst the installation of your range extender, then there is a possibility that you didn’t follow the correct guidelines. Thus, re-read the article to know where you’ve mistaken and install your device with ease.