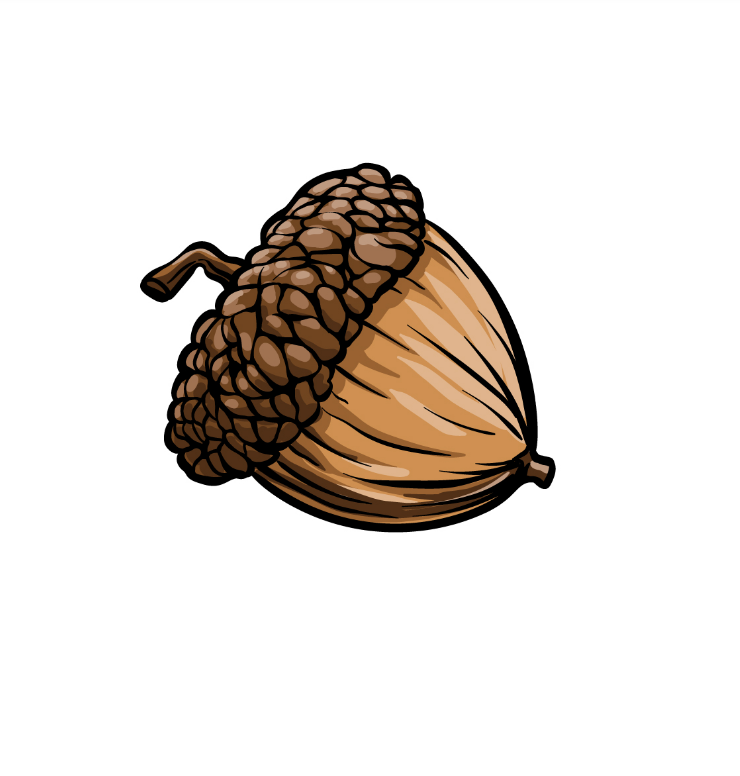
How To Draw An Acorn In nature, there are many beautiful little plants and details to admire when you go outside. The humble acorn is one of the most recognizable details you can find in nature. Acorns thrive on oak trees, each including a seed that can develop into another strong oak tree.
They have the most distinctive and recognizable structure of any nut or seed in nature, which makes them popular for featuring in the artwork. To do this, you must willingly learn how to remove an acorn! If you want to create stunning images featuring the acorn, look no further than this tutorial! Our step-by-step manual on enticing an acorn in 6 measures will show you all the leads and baits you must to draw this great little nut.
If you are looking for drawing ideas cool drawings cute drawings, drawing for kids, cartoon drawings, girl drawing, 3d drawing and many more, then you are at the right place, here you will get all of these drawings.
Step 1 :
As we begin this guide on how to draw an acorn, we will start with the general outline of the acorn. First, we’ll draw the bottom half of the glans and two curved lines that meet at a fairly sharp point at its end. This glans tip will have a small square section sticking out of it. This top section looks like a small hat resting on the tassel, and we’ll draw this outline using a curved, bumpy line. The inside of the pom will be blank without any detail, but in the next steps, we will add more detail and definition.
Stage2:
In this second step of your acorn drawing, we will finish the outline of the small “hat” of the acorn. The outline will extend inward from the glans to form the rim. This edge will be drawn with many smaller curved lines connected, as shown in the reference image. Operating these less curved lines, we will complete a harsher look for the surface of this part of the glans. Once you’re happy with how this plan looks, we’ll move on to the next part of the guide.
Step 3:
Next, we’ll add texture for the little acorn hat in this third step of our guide on how to draw an acorn. this look now. We will achieve this look by drawing lots of small, angled shapes connected in an almost tiled pattern. We’ll only draw the texture for one section of the pom pom, but we’ll fill in the empty sections in the next steps.
Step 4:
This fourth step of your tassel drawing will see you adding some more of that rough texture for the top of the tassel.
To do this, just continue what you started in the previous step and draw more of these small shapes connected to each other. This part of the texture will go on the left side of the tassel, and these shapes will be smaller and closer together to make it look denser. When you’ve drawn this section, we’ll finish the last texture elements while adding some final details in the next part.
Step 5:
Now it’s time to complete all the last details and contacts in this step of our focus on how to lure an acorn. These last details will prepare you for the last stage, where you can finish with a little color: There are also fun ways to customize this drawing further. You can draw a background to finish it off nicely, and that background can include a hungry squirrel or maybe an oak tree in the background to show what that acorn can become. Will you choose for your image?
Step 6:
As for dyeing, our understanding of this acorn method, we decided to save the colors darker and better naturalistic. To do this, we used shades of light and dark brown instead of one or two shades of brown. This helps give a more vibrant look to the image, and if you like this style, you can try using colors similar to the ones we used. You can also use completely different colors if you prefer, so let your creativity run wild. End it! In nature, there are numerous delightful little plants and subtleties to appreciate when you head outside. The unassuming oak seed is the most unmistakable detail you can track down in nature.
also read: Orbi setup: A quick overview